Windows 10 Upgrade
The corporate desktop is being upgraded from Windows 7 to Windows 10. The upgrade is required because Microsoft have announced that they will stop providing support for Windows 7 in January 2020, which means there will no longer be any security updates or fixes for any bugs/issues with features.
Moving to Windows 10 provides several benefits including:
- Office 365
- Full OneDrive integration
- Enhanced security
ICT Services aim to make the transition from Windows 7 to Windows 10 as straightforward as possible. The information that follows will help to answer any questions that you may have and provide advice about the differences you will find when you start using the Windows 10 corporate desktop.
The Windows 10 Corporate Desktop
If you are not yet familiar with Windows 10 you will find that much of what you can access from your Windows 7 desktop is provided in the same way.
The Windows 10 Start menu has a different layout to that of Windows 7, but you will still find most of your frequently used software applications there such as Microsoft Office (including Word, Outlook, Excel, PowerPoint etc.).
The following are pre-installed on Windows 10 and can be accessed from the Start menu:
- Teams

- OneDrive

- OneNote

![]() To help locate anything there is a ‘magnifying glass’ search function located on the taskbar at the bottom of the desktop screen. This can be used to search for any software applications, or any files saved within your user area. The results of any searches will be displayed in the white window and will also include any resultant internet ‘hits’.
To help locate anything there is a ‘magnifying glass’ search function located on the taskbar at the bottom of the desktop screen. This can be used to search for any software applications, or any files saved within your user area. The results of any searches will be displayed in the white window and will also include any resultant internet ‘hits’.
To Log Off or Restart the computer click on the Windows button at the bottom left of the screen. ![]()
![]() The power button offers the options to Sleep (puts the computer into a very low-power mode whilst saving it in its current state), Restart (turns the PC off and starts it again) or Shut Down the computer (power off completely).
The power button offers the options to Sleep (puts the computer into a very low-power mode whilst saving it in its current state), Restart (turns the PC off and starts it again) or Shut Down the computer (power off completely).
File Navigation: Access to Drives and Documents
![]() OneDrive is now the default save location for Microsoft Office. You should save your documents here where possible. This is automatically backed up so there is no danger of losing any documents and it can be accessed both on and off-campus.
OneDrive is now the default save location for Microsoft Office. You should save your documents here where possible. This is automatically backed up so there is no danger of losing any documents and it can be accessed both on and off-campus.
NB: OneDrive will not operate correctly until you have logged into Windows 10, launched the Outlook application, authenticated your login credentials using MFA, logged out of Windows 10 and finally logged back into Windows 10.
The C: Drive is not available to save to.
Your H: Drive is still accessible in the same way that it was for Windows 7. All stored documents that you have saved will still be available there. However, OneDrive is now the default save location for Office documents.
Accessing Software/Applications
 The majority of regularly used software is available from the Windows 10 desktop start menu. This includes Microsoft Office, web browsers and Skype etc.
Standard icons appear on the desktop to link to systems such as Blackboard, the Portal, Linc-on, OneUni and MyView.
Accessing Additional Software from the Software Center
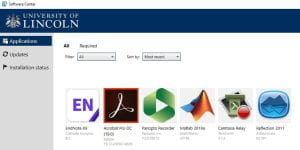
![]() The standard Windows 10 desktop does not automatically include the subject/department-specific software that you may need to access. Additional software can generally be installed from the Software Center. To locate this, click on the Windows button at the bottom left of the screen and select the Software Center icon from the tiles.
The standard Windows 10 desktop does not automatically include the subject/department-specific software that you may need to access. Additional software can generally be installed from the Software Center. To locate this, click on the Windows button at the bottom left of the screen and select the Software Center icon from the tiles.
The Software Center will open in a new Window and present any software that is available to install onto your computer. If you do not see the software that you need to access, please log a support ticket with the ICT Service Desk.
NB: The Software Center may take up to 30 minutes to become populated with available software immediately following the Windows 10 imaging process.
To install any of the software that is listed within the Software Center, click on the required software and a new window will open with an Install button.
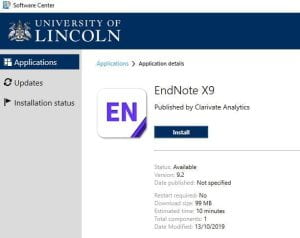
By clicking on the install button, the software will install onto the computer and progress will be reported by the Software Center. Once the installation is complete, the software will appear from the Windows button at the bottom left of the screen; the application will be easy to find as it will be listed under ‘Recently Added’, or alphabetically by the name of the software. Alternatively, it can be located by searching for it by name using the ‘magnifying glass’ search function.
A video showing how to access software via the Software Center can be found here:
Accessing Adobe Products and the Adobe Creative Cloud
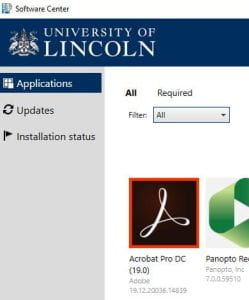 Adobe Acrobat Pro DC (for creating and editing PDF documents) for convenience, can be installed from the Software Center. See the instructions above for how to install software from the Software Center.
Adobe Creative Cloud Applications
All University staff are entitled to access Adobe Creative Cloud software both on and off-campus. It is necessary to log into Adobe to gain access to the entitled Adobe software. This can be accessed by logging into the pre-installed Adobe CC Desktop App, where Adobe software can be installed. Alternatively, software applications can be logged into directly.
![]() To access the Creative Cloud from the Windows 10 desktop, locate the Creative Cloud icon. This can be found by clicking on the arrow on the taskbar on the bottom right of the desktop.
To access the Creative Cloud from the Windows 10 desktop, locate the Creative Cloud icon. This can be found by clicking on the arrow on the taskbar on the bottom right of the desktop.
![]() Select the Creative Cloud icon and follow the on-screen instructions to access the software.
Select the Creative Cloud icon and follow the on-screen instructions to access the software.
A video showing how to access Adobe Creative Cloud software can be found here:
Accessing Internet Bookmarks
![]() Chrome Bookmarks from Windows 7 are saved in your H Drive on Desktop computers only.
Chrome Bookmarks from Windows 7 are saved in your H Drive on Desktop computers only.
To access saved bookmarks, it is necessary to change their location. A member of the Windows 10 Upgrade team will be able to assist with this.
NB: Windows 7 laptop bookmarks are not saved automatically, so these must be backed up prior to upgrading to Windows 10 if they will be needed.
Accessing the Internet for Web-based Services
The icon that is pinned to the Start Menu is for EDGE:
![]()
NB: The icon for Edge is very similar to that for Internet Explorer:
![]()
To access Internet Explorer it is necessary to find the shortcut from the Start Menu, either by typing and searching for it, or by scrolling down to the folder ‘Windows Accessories’:
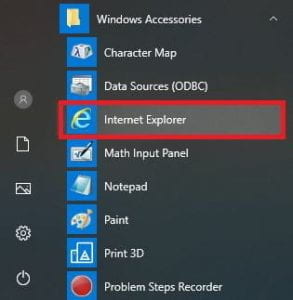
If you need to access QLS, this MUST be launched in INTERNET EXPLORER, NOT Chrome or Edge.
Accessing Shared Mailboxes and Calendars
Any Mailboxes or calendars that have not previously been added centrally, will need to be re-added back into Outlook. A member of the Windows 10 Upgrade team will be able to assist with this.
![]()
Accessing Mapped Network Drives
Mapped network drives do not automatically transfer into Windows 10. A member of the Windows 10 Upgrade team will be able to assist with this.
Setting Signatures
To set a new signature for use with your Outlook email, please navigate to the following link, where you can input your own details: