How To… | Set Up Sharing Permissions in SharePoint
Ensuring your sharing options and permissions are correct in SharePoint
What is SharePoint?
Microsoft SharePoint is a cloud-based service that helps organisations share and manage content, knowledge, and applications to:
- Empower teamwork
- Quickly find information
- Seamlessly collaborate across the organisation
When you share documents from your OneDrive or a Team, you may notice that the URL includes ‘sharepoint’ as part of its string. This is because file storage in Microsoft 365 is powered by Microsoft’s SharePoint system which works behind-the-scenes in Office 365 applications, such as Teams and OneDrive.
SharePoint can also be used to build collaborative intranets with document libraries and sites. The University of Lincoln Portal, for example, is built in SharePoint and works seamlessly with Microsoft Office 365 to make file storage and sharing and collaboration easier across the organisation.
For full guidance on how to use SharePoint as part of Office 365, visit the Microsoft Office Support Site.
Sharing Permissions in SharePoint
When sharing files, folders and sites in SharePoint it is important to make sure that this is done in the right way. This will ensure your files are secure, and can only be accessed by the right people.

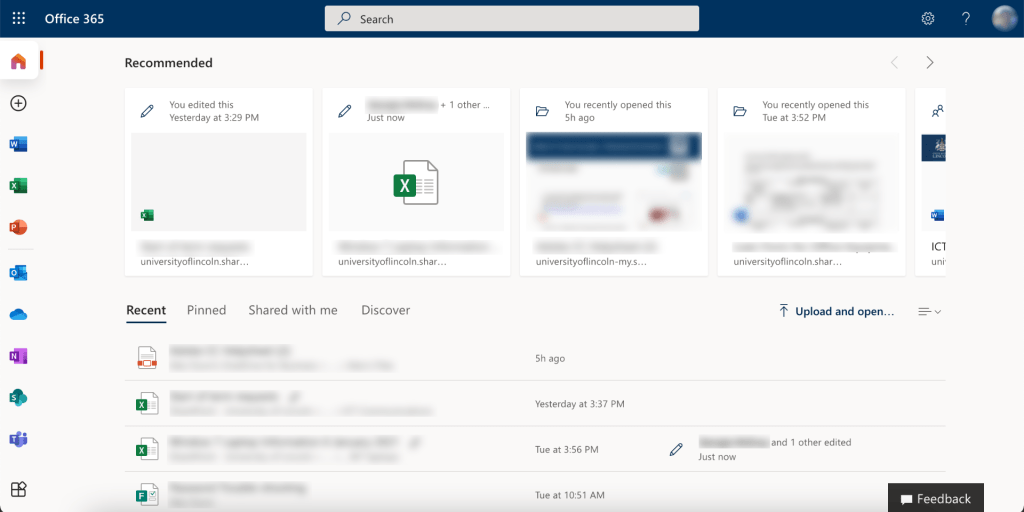
If you have a file or folder stored in a Team, everyone within that Team will be able to access it viaOneDrive and SharePoint – because files in Teams and OneDrive are stored on SharePoint as it works behind-the-scenes. This means that files may show up on your main Office 365 page in your “Recommended” section, or under the “Recent“, “Shared With Me” or “Discover” tabs. You may have noticed files show up in these sections which you thought were irrelevant to your work, or that you shouldn’t be able to see. This is because the files which show up in this section can come from any of the Teams you are a part of, or any OneDrive folders you may have been given access to.
Please Note: For more information on setting permissions specifically within Teams or OneDrive, please take a look at our How To guide.
As SharePoint works in tandem with Teams and OneDrive, there are many similarities in how you manage access for individual users and groups.
It is worth regularly checking what permissions you have set up on your Teams sites and shared OneDrive folders (particularly those which contain sensitive information). The guidance below will help you to understand the correct way of sharing data across Microsoft Office 365 products, while ensuring minimum risk of sensitive information being seen by unwanted audiences.
How to check and change SharePoint Permissions
You can check a file or folder stored in SharePoint to see who it is shared with, or change the permissions others have to it, if you’re the owner of the item.
Note: You can’t change the permission of a sharing link from edit to view or from view to edit. To get around this, you will need to delete your sharing link and create a new one with a different permission.
Stop or change sharing
Files and folders can be shared by sending someone a sharing link or by giving them direct access to the file or folder. Users may also have access to a file or folder if they’ve been given access to the site itself (this includes Teams sites as well as SharePoint sites).
If you are the file owner, you can stop sharing the file or folder.
If someone has been given direct access, or has access through a specific people link, you can also change the sharing permissions between view and edit.
- Select the file or folder you want to stop sharing.
- Select the Information icon in the upper-right corner to open the details pane.

Note: (The Information icon is just below your profile picture. If you don’t see it, make sure you only have one file or folder selected – it won’t display if you have multiple items selected.)
- On the details pane, under the “Has Access” header, you’ll be able to see the People icon, the Links icon, and/or the Email icon. These options vary depending on how you have shared the file or folder. Select “Manage access” and:
- To stop sharing the file entirely, click “Stop sharing“.
- To delete a sharing link, click the … next to the link, then click the X next to the link to remove it. (You’ll get a prompt asking you if you’re sure you want to delete the link – if so, click “Delete link“.)
- To stop sharing with specific people, expand the list under a specific people link and click the X to remove someone.
-
To change permissions or stop sharing with someone who has direct access, under Direct Access, click the dropdown next to the person’s name and choose the option that you want.